-
Notifications
You must be signed in to change notification settings - Fork 25
/
Local Deployment.md
82 lines (43 loc) · 6.52 KB
/
Local Deployment.md
1
2
3
4
5
6
7
8
9
10
11
12
13
14
15
16
17
18
19
20
21
22
23
24
25
26
27
28
29
30
31
32
33
34
35
36
37
38
39
40
41
42
43
44
45
46
47
48
49
50
51
52
53
54
55
56
57
58
59
60
61
62
63
64
65
66
67
68
69
70
71
72
73
74
75
76
77
78
79
80
81
82
# Local Deployment
Takeaway
+ Vitual Environment - Conda
+ Testing on Command Line Interface Software
+ Testing on Web Interface Software
1. Search how to download VSCode as your IDE. Search how to download **Anaconda** in your computer. Meanwhile, you will get a command line tool called **conda**. Use `conda --version` to check whether it exists on VSCode console.
<img width="920" alt="image" src="https://github.com/ZJUEarthData/geochemistrypi/assets/47497750/6fbeda21-88e5-424f-a6d8-eb7b8f44f915">
2. Create a virtual environment using `conda create --name geo python=3.9 `.It would create a new Conda environment named "**geo**" with Python version 3.9.
<img width="919" alt="image" src="https://github.com/ZJUEarthData/geochemistrypi/assets/47497750/82852364-111c-4462-a384-2e7f029af1f4">
Enter **y** to go on and then it is done quickly.
<img width="918" alt="image" src="https://github.com/ZJUEarthData/geochemistrypi/assets/47497750/287a5a27-91e3-4070-a01c-b289a709e960">
3. Activate your created virutal environment through `conda activate geo` . Once it is activated, the head your command line would change from **(base)** into **(geo)**.
<img width="920" alt="image" src="https://github.com/ZJUEarthData/geochemistrypi/assets/47497750/7baca84b-ee44-4ff4-8b99-3c30e6c2f2a3">
Caution! Sometimes you will get a problem of Python dependency management. You will get the illusion that I did download the required dependency using **pip**, but why it told that I haven't downloaded the related dependency yet when running the Python script.
It is caused by the not correct **pip** you use. Here is the solution to resolve. On **MacOS**, you can use `which -a pip` to check whether the **pip** used belongs to the virtual environment **geo**. The alike command on Windows Powershell is `Get-command pip`.
The result shows that the **pip** currently used belongs to your system environment. Because the first location is `/usr/local/bin/pip`. It means the highest prority. Also it indicates whenever you execute `pip install some-dependency`, the first location takes precedence. All the dependencies would be downloded to your system environment.
<img width="903" alt="image" src="https://github.com/ZJUEarthData/geochemistrypi/assets/47497750/659445ff-04e6-47ce-8fd1-9a4d54378d29">
This problem happens occasionally when you activate your virtual environment **(geo)** in **(base)** environment. Hence, you can resolve it by deactivating from **(geo)** and then deactivating from **(base)**. Continually, you need to activate **(geo)** again.
<img width="908" alt="image" src="https://github.com/ZJUEarthData/geochemistrypi/assets/47497750/377f3e12-1897-41fa-9f0d-341dccba23d4">
4. Go into the directory **requirments** and download necessary dependencies to run Python code by executing `pip install -r development.txt`. Then wait until all dependencies are downloaded.
<img width="912" alt="image" src="https://github.com/ZJUEarthData/geochemistrypi/assets/47497750/d837c2d4-39a8-406b-8749-b03ff5924b7c">
<img width="909" alt="image" src="https://github.com/ZJUEarthData/geochemistrypi/assets/47497750/e9b5bf92-c07f-4a94-abe1-2bdbaaee6cbb">
<img width="936" alt="image" src="https://github.com/ZJUEarthData/geochemistrypi/assets/47497750/44c38451-ae27-4955-bdbd-ca34917fe9d6">
5. Now you can test our command-line-interface (CLI) software locally by navigating to the directory **geochemistrypi **and then execute `python start_cli_pipeline.py`. You can press **ctrl + C** to stop anytime in the middle.
<img width="910" alt="image" src="https://github.com/ZJUEarthData/geochemistrypi/assets/47497750/b217287f-9500-4c52-8382-71d1456c2bfe">
Also, you can launch the backend server as well by using `python start_dash_pipeline.py`. Until now, you can copy the address **http://0.0.0.0:8000** shown in the below picture and open it in the browser.
<img width="934" alt="image" src="https://github.com/ZJUEarthData/geochemistrypi/assets/47497750/2934f7ac-d7d3-4213-8a55-5013717f1464">
This indicates that the backend server works normally.
<img width="1259" alt="image" src="https://github.com/ZJUEarthData/geochemistrypi/assets/47497750/19e16dd8-e342-4577-b5bf-59a7eb152dcb">
Besides, you can append the suffix **/docs** to the backend server address **http://0.0.0.0:8000** to make **http://0.0.0.0:8000/docs**. Then use this address to open our API interface in the browser.
<img width="1261" alt="image" src="https://github.com/ZJUEarthData/geochemistrypi/assets/47497750/1aa02ffe-0d95-4970-a1e9-3a8adbe88f5f">
Of course, you can open Dash page too by using the address **http://0.0.0.0:8000/dash**. But it is not recommended to use here because the functionality data uploading under the hood is binded with the frontend framework. No rush. More detail would be shown later on.
<img width="1261" alt="image" src="https://github.com/ZJUEarthData/geochemistrypi/assets/47497750/7dcf52a2-0902-4472-93fd-11018dc0e351">
6. In order to activate the frontend server, you need to search how to download **node.js** (find the version suitable your computer) firstly. After installing Node.js, verify that npm is installed correctly. You can open a new terminal or command prompt on VSCode and use `npm --version`.
<img width="968" alt="image" src="https://github.com/ZJUEarthData/geochemistrypi/assets/47497750/0f95b680-8599-4dd8-960d-c7f14e17631d">
Once you have Node.js and npm installed, you can use `npm install yarn` to install Yarn on your system.
<img width="960" alt="image" src="https://github.com/ZJUEarthData/geochemistrypi/assets/47497750/7bb69306-ac67-47d5-80b3-c662f8a83215">
Then, you can navigate to the directory **frontend** and use `yarn install` to download related dependencies.
<img width="924" alt="image" src="https://github.com/ZJUEarthData/geochemistrypi/assets/47497750/96703c6c-a8a2-49c8-b94f-0f9f183094c0">
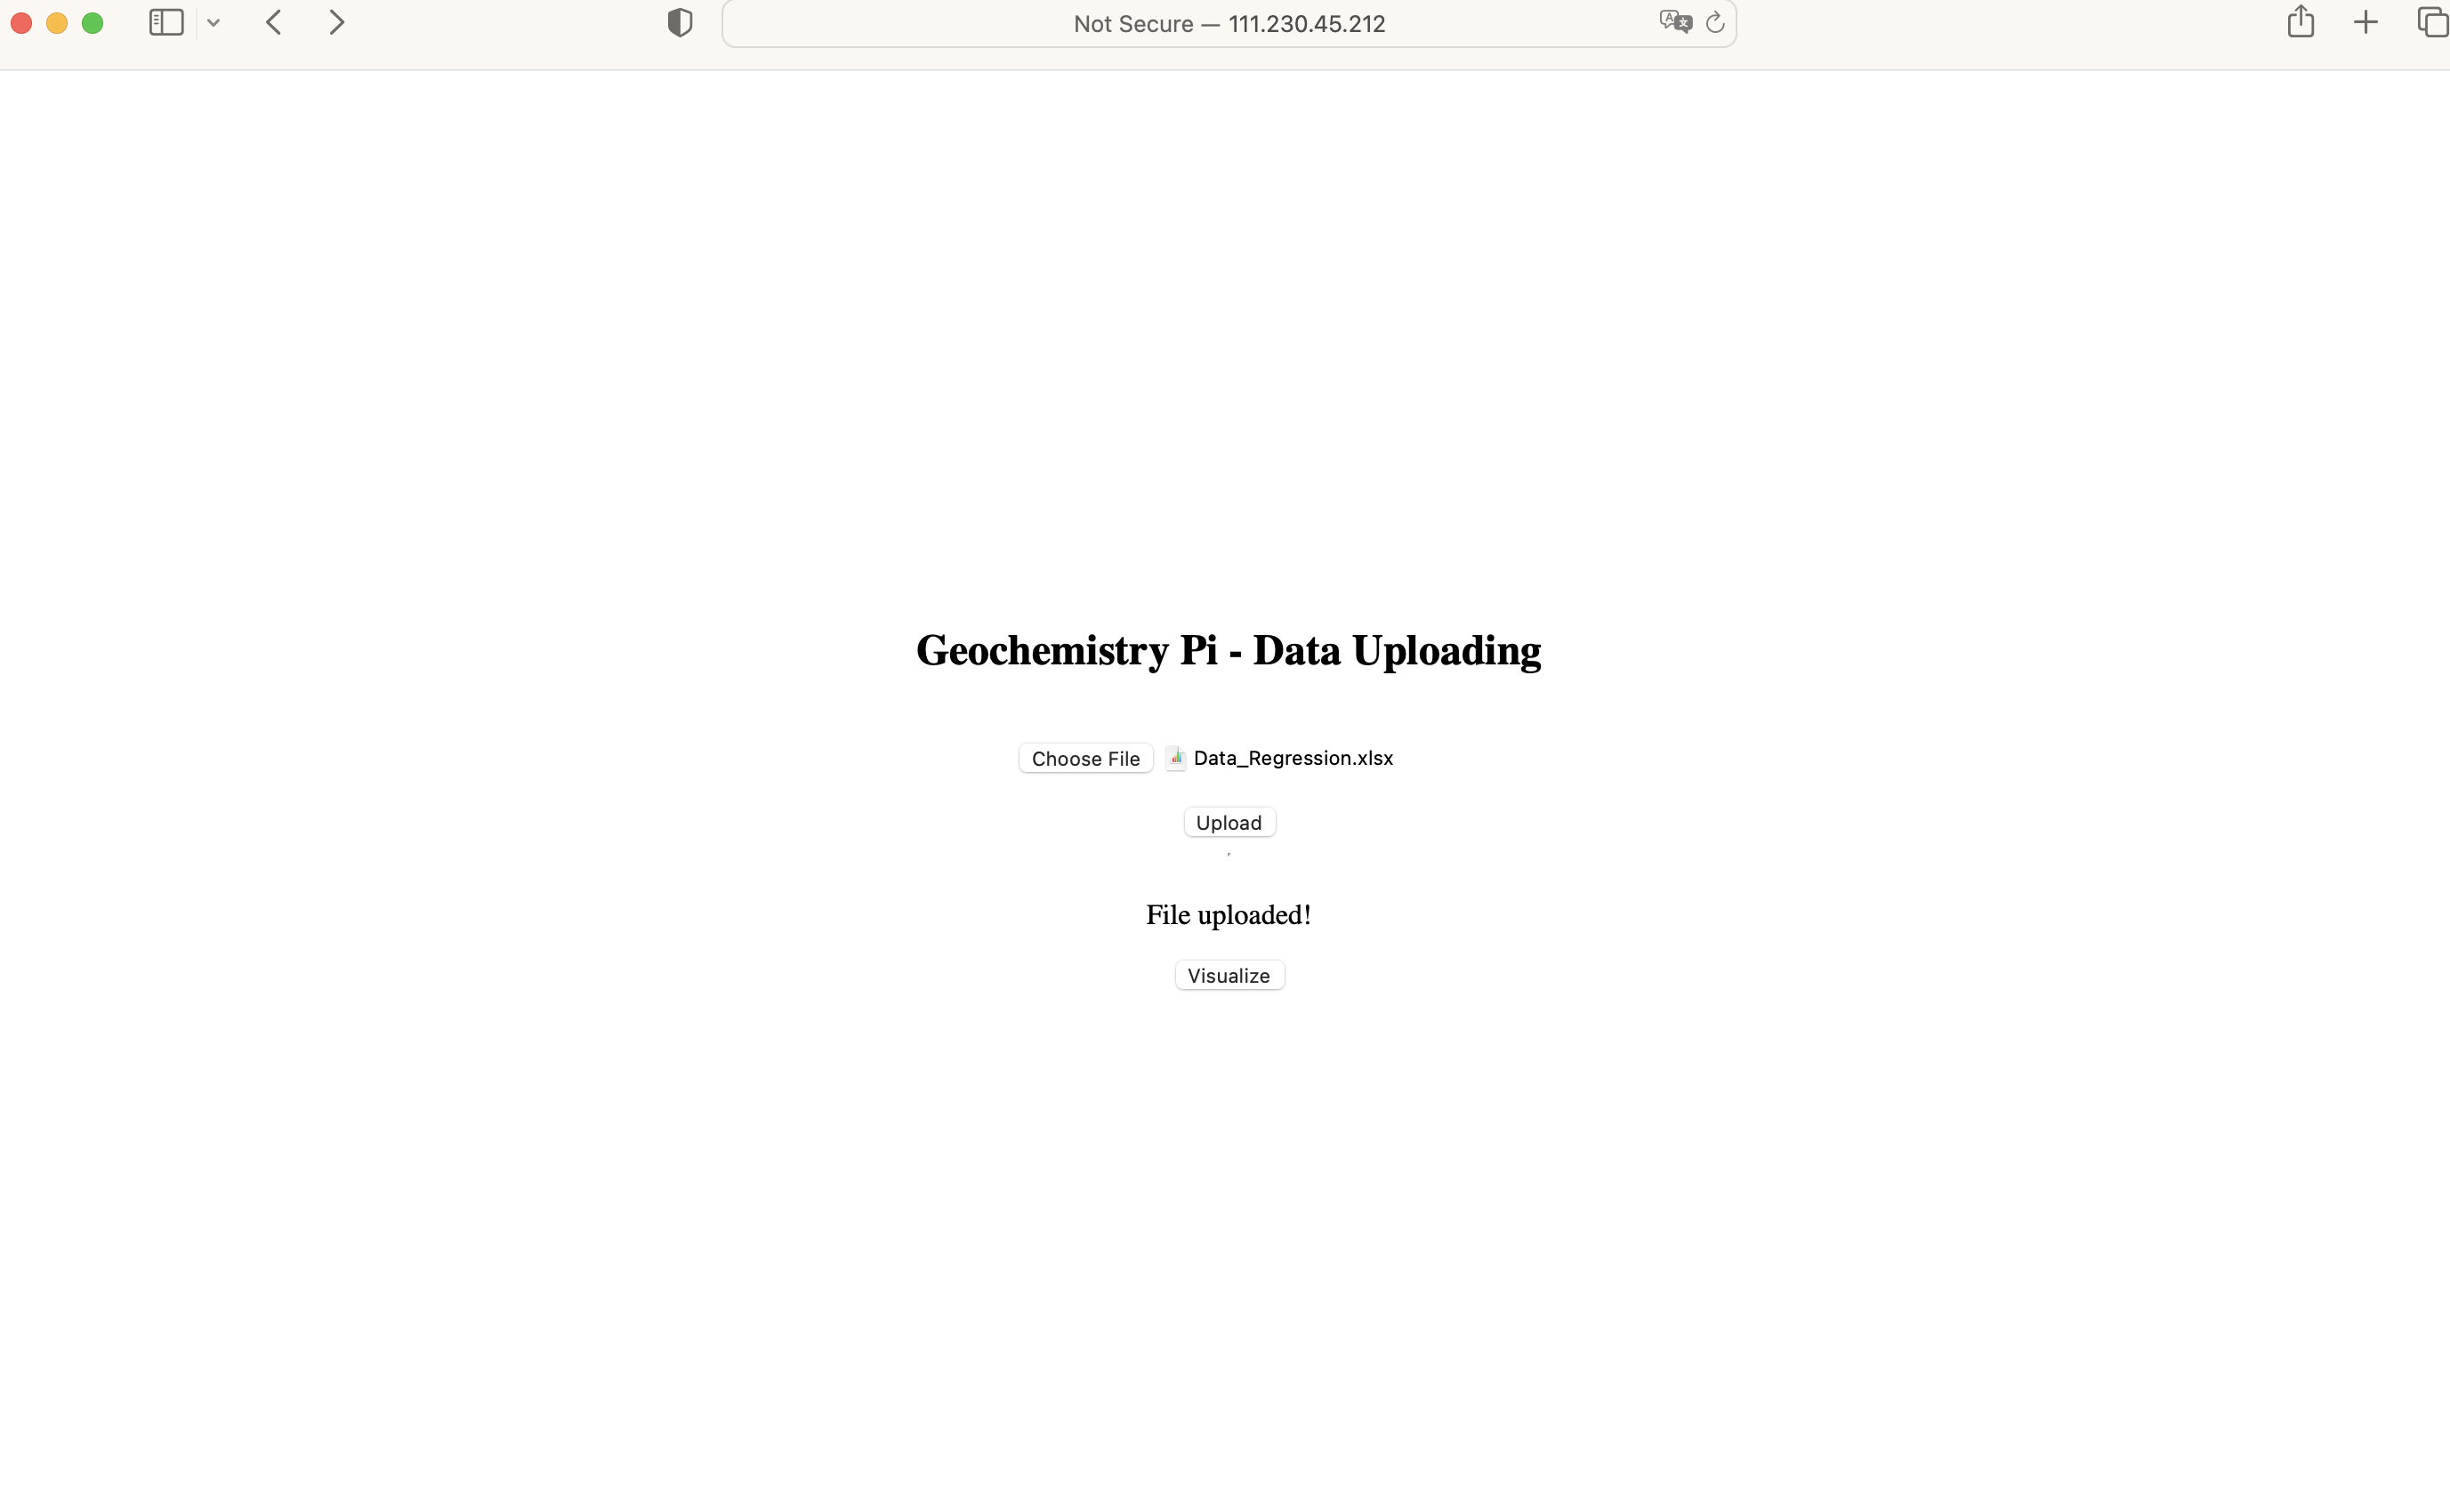
Now, you can use `yarn start` to activate the frontend server. The webpage will pop out from your default brower automatically. When you modify the code related to backend or frontend. You don't need compiled them. They would be complied automatically once the code changes. Any mistake would be monitored directly from the console. So keep both servers active if you want to do experiment.
<img width="1022" alt="image" src="https://github.com/ZJUEarthData/geochemistrypi/assets/47497750/c935ae48-aa18-4a48-84ad-90ce2b0d6b11">
Hooray,this is the tiral webpage.